Minoru Jacket

So I still have a load of unphotographed, unblogged projects, but this one is jumping the queue.  It’s a Minoru Jacket by Sewaholic and I’m quite pleased with it….

p1020186

After the success of my blue coat, I decided I fancied making a jacket for the slightly warmer days, maybe something shower proof.  It took a while to find the right fabric, and I eventually found it on eBay – from a seller who has loads of ex-designer and interesting fabrics from Italian textile mills.  This fabric was apparently Hugo Boss and is described as a microfibre satin canvas in a dark peat colour, and I think it’s what makes the jacket such a success.  I got a swatch, and loved the feel of it – it only cost £6 a metre, but it feels expensive.  It’s 150cm wide as well, so excellent value all round really!  I can report that it is shower proof, thanks to a handy shower on my way home the other day.  I wasn’t worried about full-on waterproofing, so I didn’t waterproof the seams or anything fancy like that.

p1020194

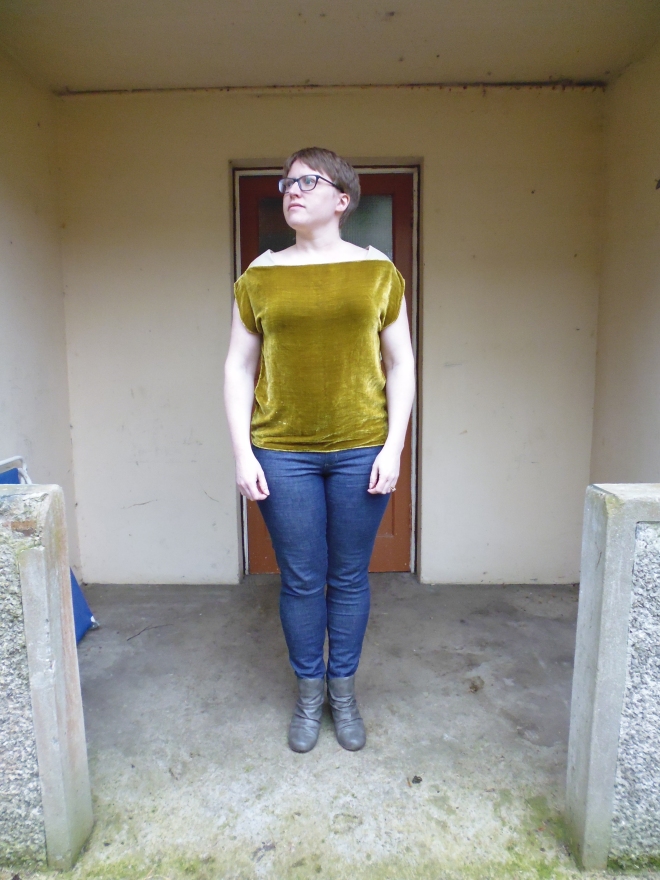
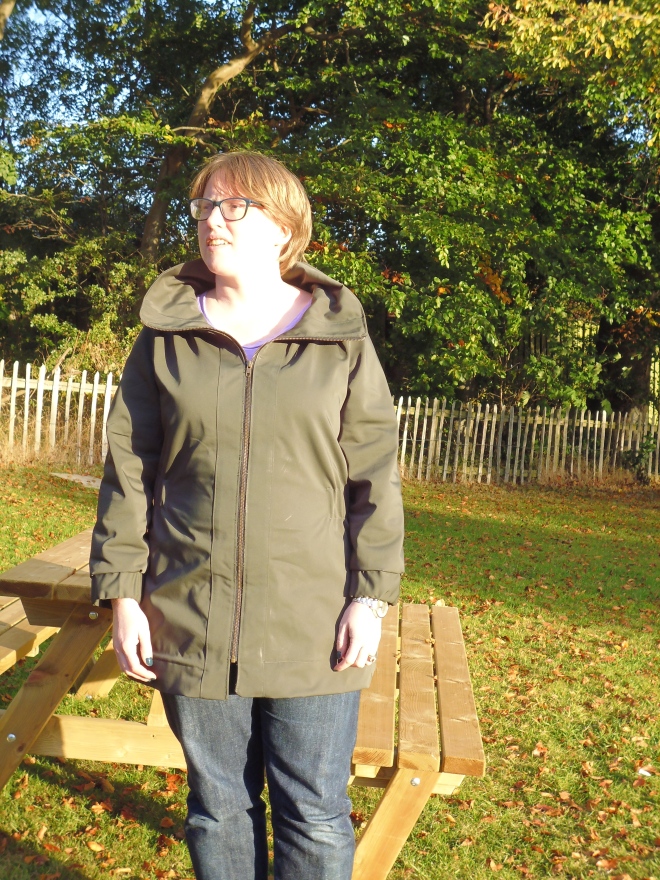
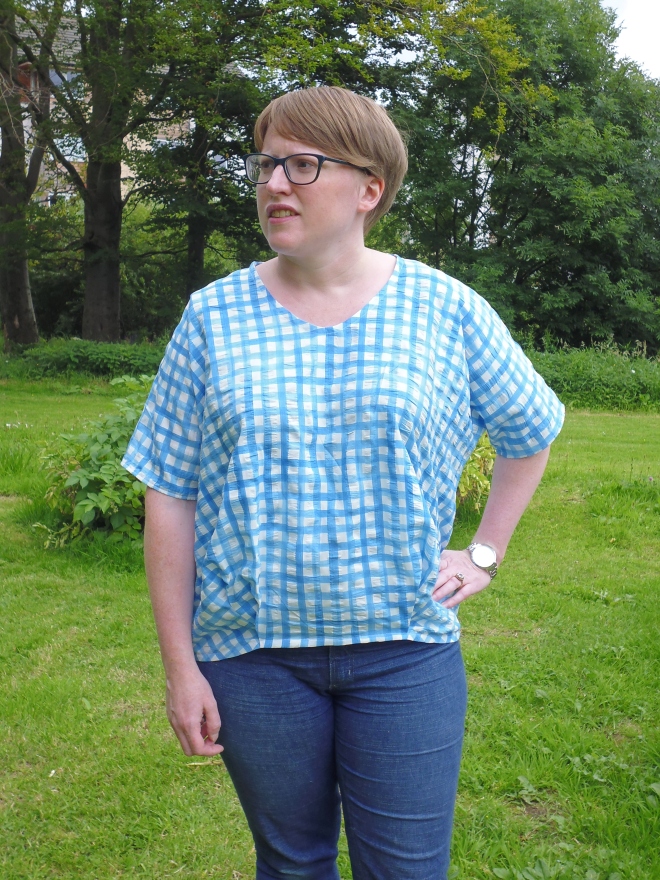
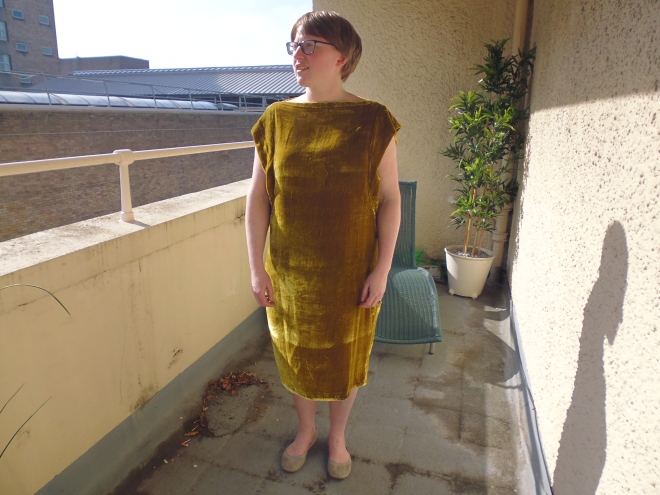
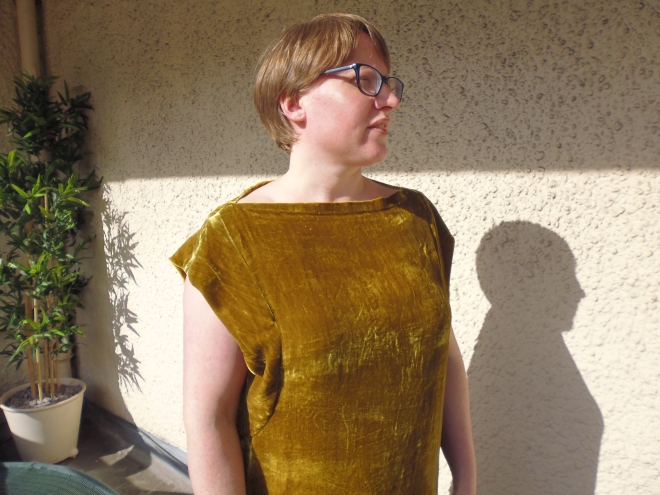
You can see the slight sheen of the fabric in this photo – I think that’s one of the things that makes it feel so luxurious.  It was slightly tricky to gather – even using the longest stitch length I could only gather a couple of cm from the end of the gathering stitches using the normal method.  Instead, I used a trick I’d seen somewhere online, can’t remember where, which was to use a wide zigzag stitch over some yarn between the gathering markings, then pull the yarn.  It worked a treat.

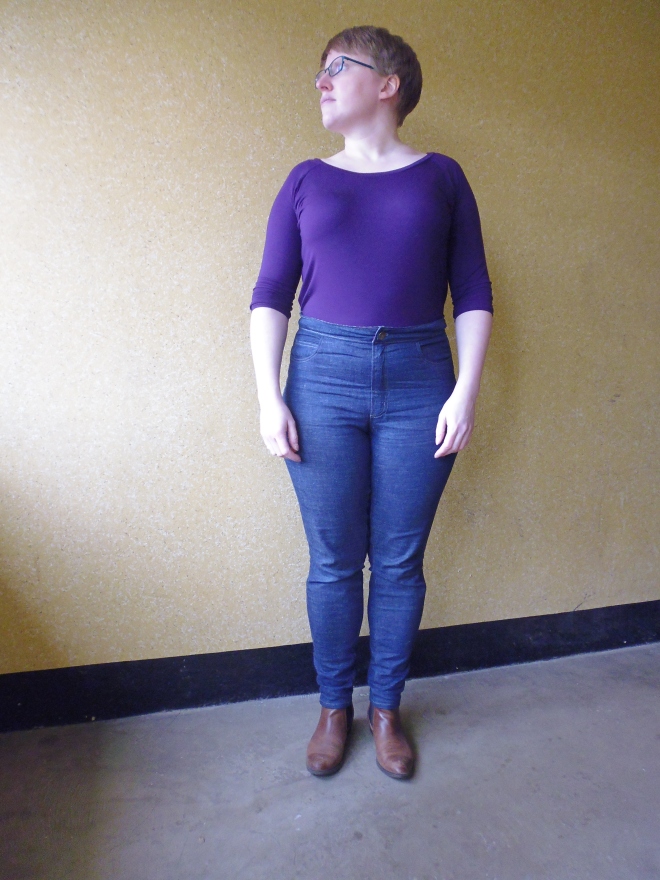
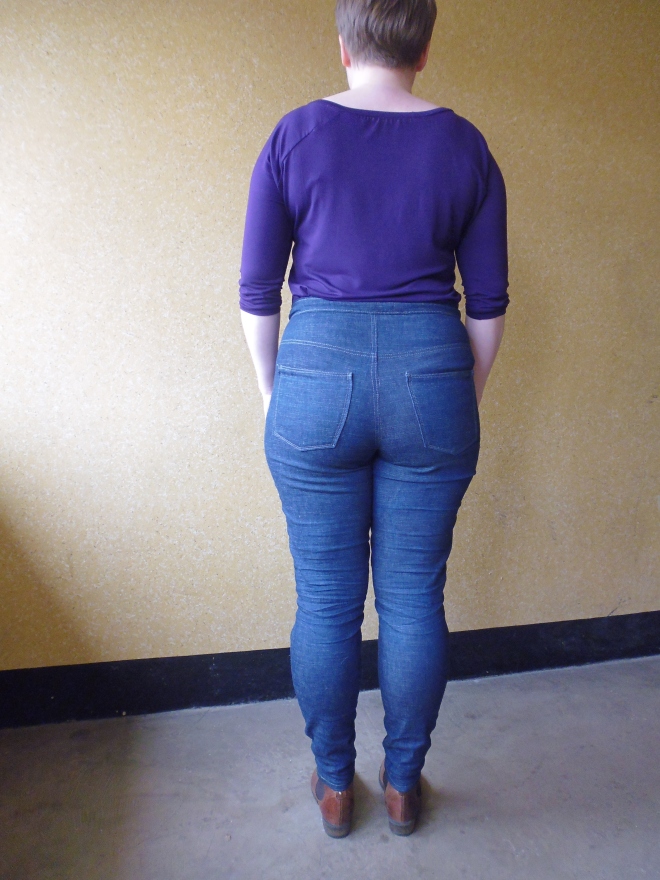
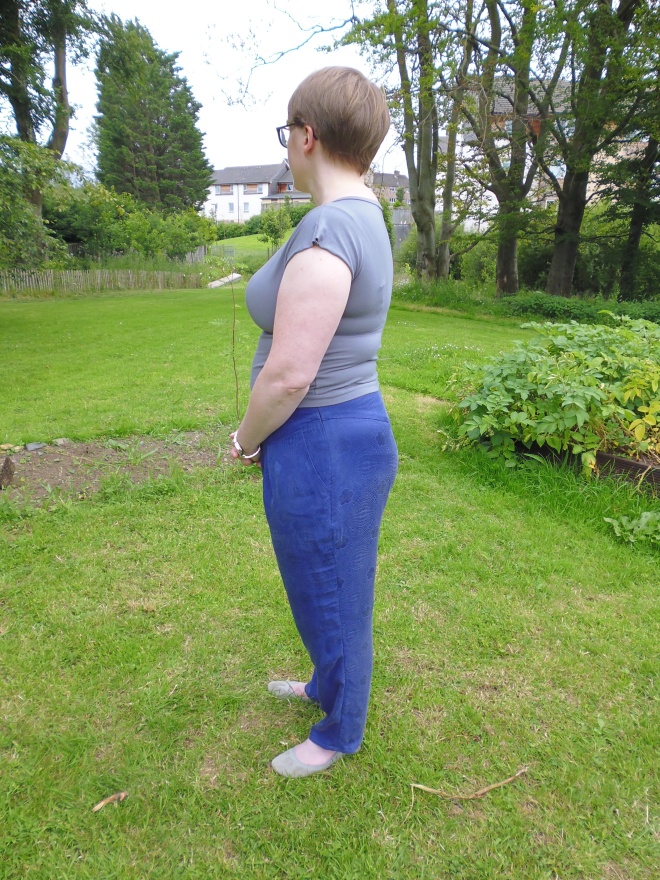
I cut a size 14, no grading to a larger size at the hips required, thanks to the Sewaholic drafting for pear shapes.  I could possibly have shortened it slightly, I think it’s come up a bit longer on me than intended, but I quite like it like that.  Once I’d set in the sleeves I tried it on and discovered that they were way, way too long – I had to chop off a good 10cm at least.  I might actually have chopped off very slightly too much – I’m used to sleeves being a bit long on me so it feels weird to have them stop at my wrist.

p1020193

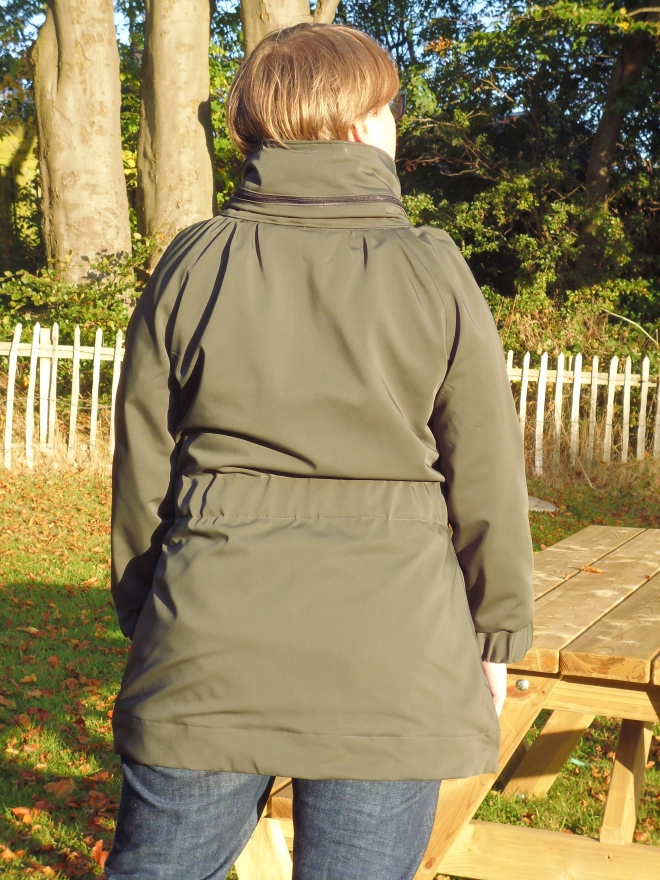
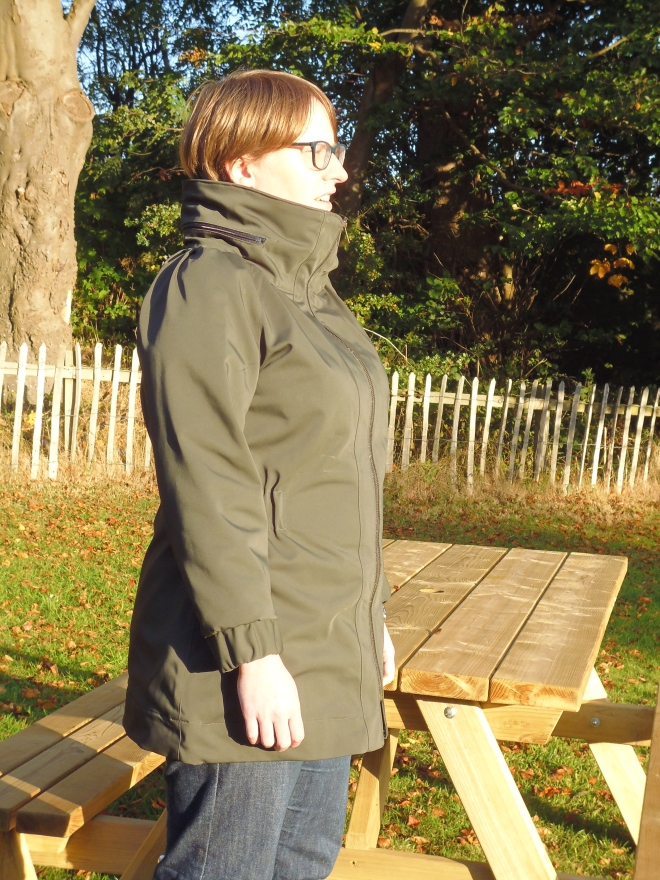
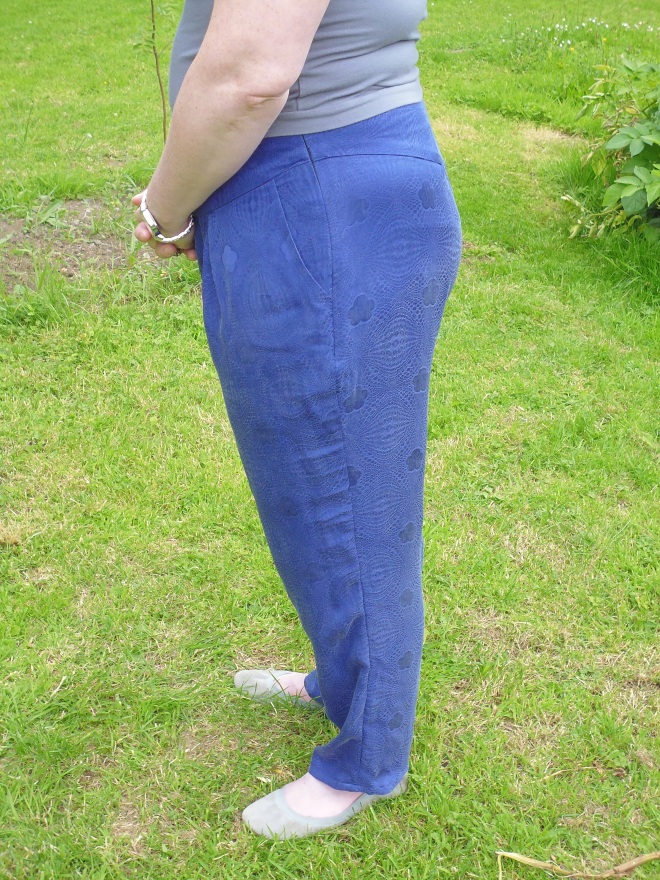
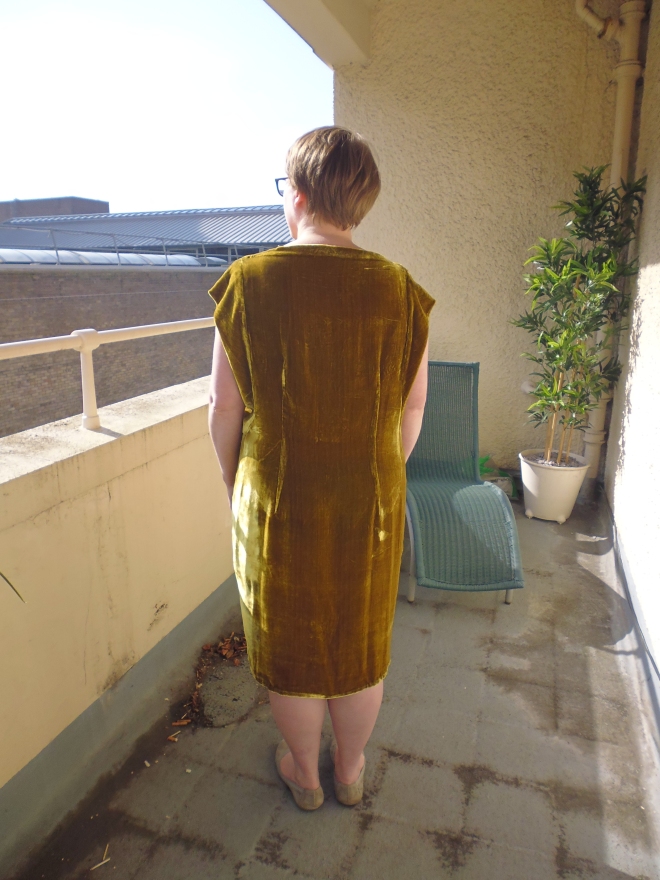
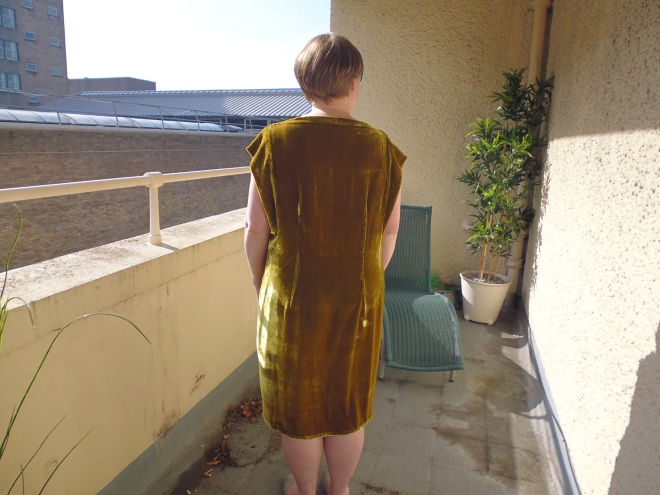
I really like the wide elastic at the back waist, it makes the jacket feel nice and snug even in Edinburgh’s windiest weather.  The sleeve cuffs could be a little bit snugger but they’re not loose enough to annoy me so I didn’t bother to make them any narrower.

I did have to put the zip in twice – my first attempt was distinctly wonky, and the uneven corners at the bottom were really obvious so I ripped it out.  Definitely much better the second time round.  I didn’t have any other problems with the construction, it actually came together quite easily.  My machine coped fine with the very densely woven fabric, I used a ‘Sharp’ needle and ordinary Gutermann’s thread and had none of the trouble I’d half expected.  It also wasn’t as shifty as you might think – it was actually really stable and quite easy to cut.  I did need a new rotary cutter blade, but seeing as I hadn’t changed it for months that wasn’t very surprising.

p1020201

The bottom corners look a bit wonky here, but they’re definitely not in real life!

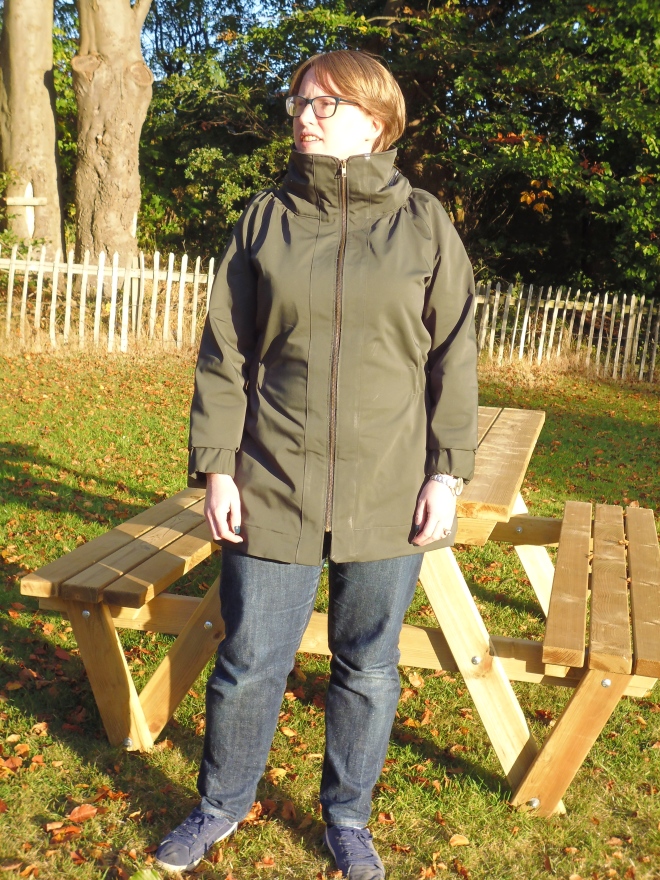
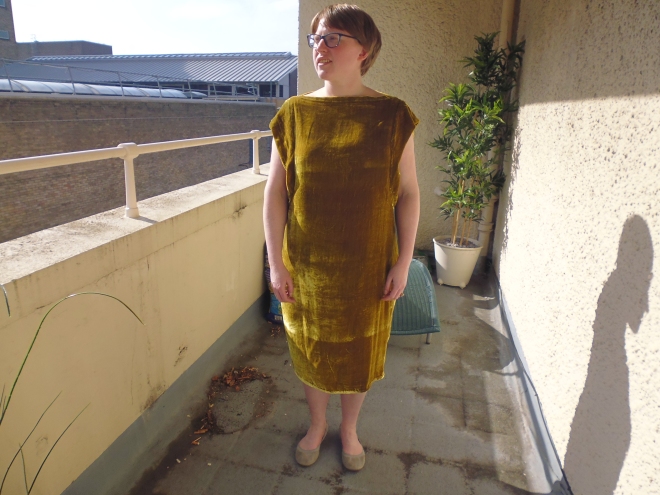
Until the recent cold snap we had, I’ve mostly been wearing it this way.  It’s super cosy zipped all the way up though, with room for a scarf in there, and with one of my toasty wool cardigans on I was easily warm enough even in the 0 degrees weather we had a couple of weeks ago.  That’s partly down to the soft, brushed cotton I used for the lining – I had bought some lining fabric, but decided I wanted something a bit warmer.  I found this plaid fabric at Fabworks Online – I can never resist a teal – and when it arrived it turned out that the ‘grey’ of the description was almost exactly the same colour as my main fabric.  It must have been fate!  p1020203

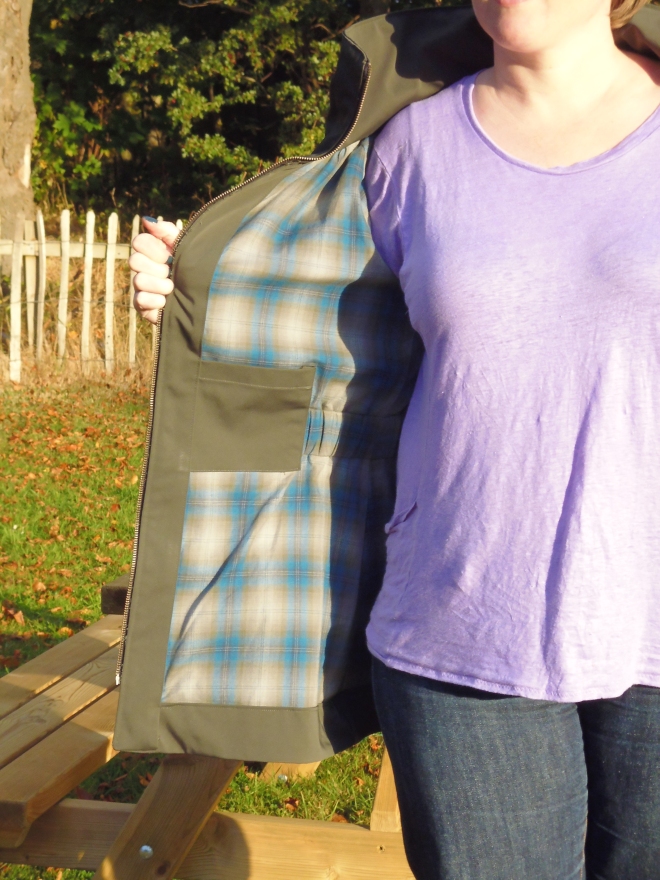
I didn’t bother being too careful with pattern matching the lining – I lined up the horizontal lines without worrying too much about the vertical.  I’m really glad I went with this rather than the lining fabric I had originally planned – it’s one of my favourite things about this jacket.

p1020210

That hanging loop is ribbon, not made from the main fabric as per the pattern

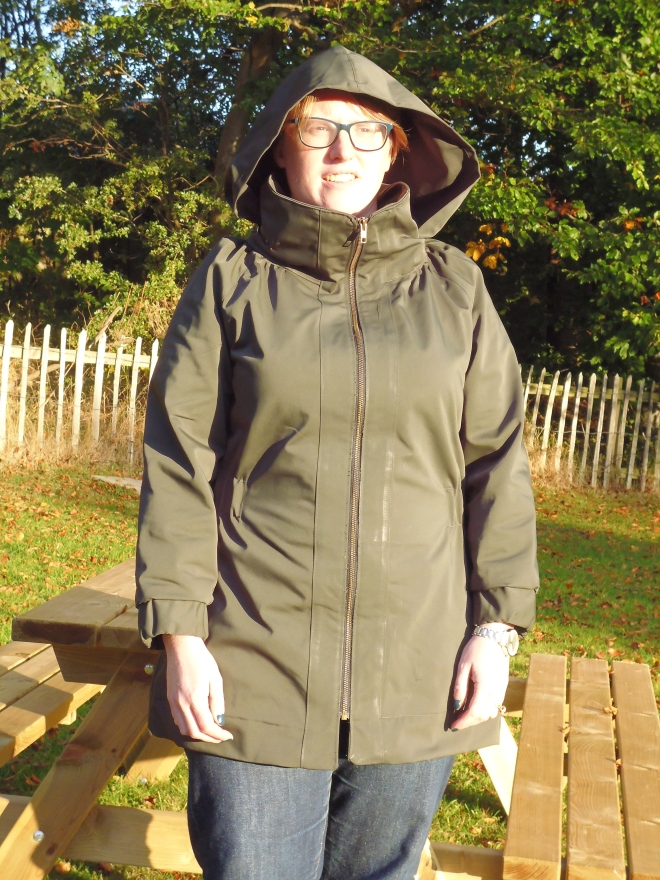
I love the hidden hood – it’s a little bit big on me, but again means there’s lots of room for a woolly hat or big cowl for when it’s colder.  It also means I can hide in it at the bus stop if I want to avoid having to make conversation with my neighbours first thing in the morning…..I’m not a social butterfly at the best of times and polite chit-chat at 8.30am is not my idea of fun!

p1020197

This was a really successful project in the end, from main fabric to lining to construction, and has been one of my most complimented makes as well.  I always get a gratifying reaction at work, but I also wore this to the recent sewing bloggers meet-up in Edinburgh and had some lovely comments from my fellow dressmakers which meant a lot – these people know what they’re talking about!

p1020209

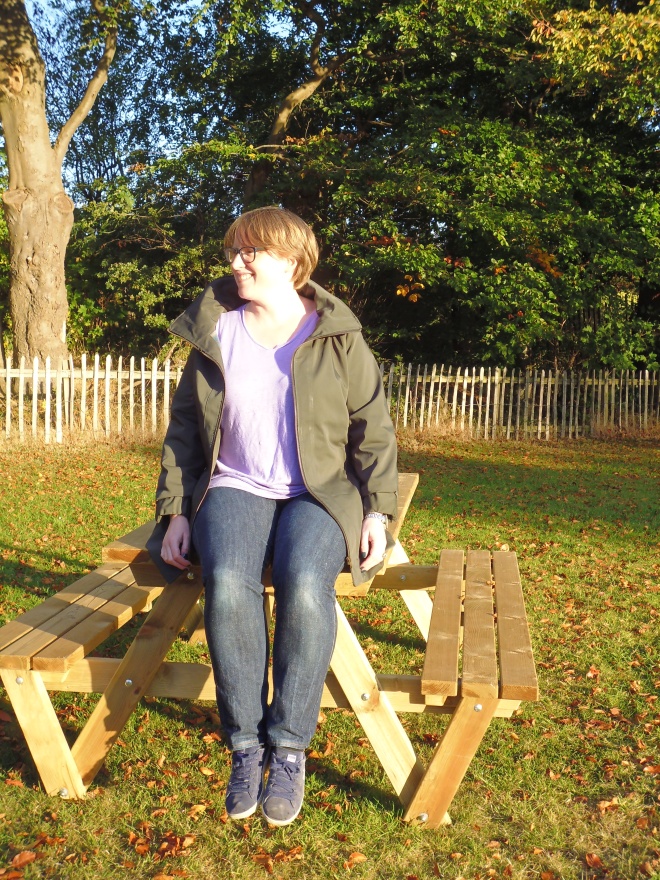
Feeling pretty chuffed at the end of this photo shoot!


Adventures in bra making

Well, radio silence for a while there, not really intended, just life getting in the way.  I also have a massive backlog of finished things to photograph and then blog, will get there eventually I expect.  In the meantime, have some musings on my recent foray into the world of making bras.  I’ve pondered on this for a while, and you’ll be glad to hear that there are no photos of said bras actually on me in this post.  The world’s not ready for that…..maybe one day…..

I’ve been thinking about making bras for a few years now.  I came across the Cloth Habit blog, and her bra-making sewalong, thanks to Pinterest, probably about 5 years ago.  It always seemed a bit intimidating to be honest, but then I felt like that about making jeans and that wasn’t nearly as scary as it seemed once I tried it.

I finally took the plunge back in May, according to Instagram.  The turning point came when I saw that Craftsy had an offer of a free class for new customers – I took the ‘Sewing bras – construction & fit’ class, and I found it incredibly helpful.  After that, the most intimidating thing was gathering all the different fabrics, elastics and notions.  This was made more complicated by the fact that my measurements put me somewhere between a C and a D cup – and in bra making apparently that’s a big dividing line, with different elastic widths being required.  So I was gathering two sets of different supplies of elastic….and who knew how many different types of elastic existed?!  Eventually I managed to round up all the necessary bits and pieces, and embarked on my first bra…..

p1020172

This was the Marlborough bra from Orange Lingerie – I did a bit of research and this pattern seemed to be a good starting point for a beginner.  I have to say the instructions were not all that comprehensive – if I hadn’t done the Craftsy class I would have been completely lost.  I bought the grey Simplex fabric from Sewing Chest (they don’t seem to have it anymore), along with the hook & eye, rings & sliders.  It’s a knit fabric but with very little stretch – as recommended on the Craftsy class, and specified in the pattern.  The grey powernet for the back band came from The Bra Shop on Etsy, and the elastics were gathered from various places – Sewing Chest, The Bra Shop and various sellers on Ebay.  I then discovered, on a bit of a fitting odyssey, that a metre of fabric goes a long, long way when making bras!  Unfortunately the colour’s a bit hard to photograph well, but it’s a really useful pale neutral.

p1020175

I started with a 36C, based on my measurements – but I obviously went wrong somewhere when measuring myself because my first version was way, way, too small.  I can’t remember exactly which sizes I then went on to make, but I made 4 or 5 bras in different sizes before getting to a point where I had the right starting point at least.  This ended up being a 38D.  It was a slightly frustrating process, but on the plus side, all those non-fitting bras were perfect for practicing the bra making techniques that were mostly new to me – particularly applying the various elastics and underwire channelling – precision sewing isn’t something I do a lot of usually……

P1020102

quite pleased with that underwire channelling topstitching….

It’s not a perfect fit, it looks and feels fine when I put it on, but wearing it for the whole day I start to feel like I’m spilling over the cup on the left side – I’m not sure if this is the effect of needing the straps to be brought in narrower, or if it’s just because the power bar has too much of a push-up effect for my tastes.  I’ve avoided trying to work out how to bring the straps in a bit – the Craftsy class shows how to do the alteration, but on a normal cup with just an upper and lower cups.  On this pattern the strap joins on to the top of the power bar – and I think trying to move it would change the shape of the cup entirely, and I’m not brave enough yet to try and tackle that!

p1020168

My next attempt was Orange Lingerie’s Boylston bra, using the same fabric – I felt like I had a chance at starting with the right size at least, with it being from the same pattern company!  Unfortunately I still had problems – the bridge of my bra wasn’t anywhere close to touching my chest wall but floated way out between my breasts.  Everything I read said that this fitting problem meant that the cup size was too small.  So I made two bras in larger cup sizes, but the same problem was occurring, this time along with cups that were blatantly just too big.  After some mental huffing and puffing in frustration, and some googling, I discovered the book ‘Demystifying Bra Fitting and Construction‘, also by Orange Lingerie.  This recommends starting the fitting of a bra by fitting the bridge, on its own.  It has you isolate the bridge, if your pattern doesn’t already have it isolated, and cut into 2 halves out of card, with ‘seam allowance’ so you’ve got something to be able to clip together.  You then use this adjustable bridge (as in the photo on the left below) to find the shape that fits your chest wall and under-breast area.

P1020099P1020098

Well, as you can see on the right, my new bridge shape was slightly different to the original, and I wasn’t sure how much difference it would make to the overall fit – but it worked a treat!  I went back to the 38D, used my new bridge pattern piece, and hey presto, one brilliantly fitting bra.  The only other adjustment I made was to bring the straps in quite a bit – an inch – I think I must have narrow shoulders.  I’ve always wondered why every bra I’ve ever owned has had an uncontrollable urge to slip off my shoulders all the time…..  I brought the straps in both at the back and the front, following the Craftsy class method of doing this.

p1020171

I wear this bra all the time – it’s a useful colour, feels comfy and has a really flattering shape.

P1020110

Some more fancy topstitching…

I really like this pattern, and I’ve now gone on and made several more bras using it – in some very different fabrics.  It’s really interesting to see how the same pattern seems completely different, just with a change of fabric.  My first variation was made using a kit from The Emerald Studio – I started reading Erin’s blog recently and I find it really inspiring.  The main fabric is a wicking knit fabric, again with very little stretch, with white powernet and white notions.  I also did the topstitching in white, mainly because I was too lazy to change the thread in my machine, but I really like the effect.

p1020177

This one is also really comfortable to wear, and is in regular rotation.

p1020179

My most recent bra was made from some gorgeous gold lace fabric, also from The Emerald Studio.  I was a bit nervous about working with lace, but again it wasn’t as scary once I’d actually tried it.

p1020181

This bra is by far the most glamorous piece of lingerie I own, and I love wearing it.  Surprisingly it’s also comfy to wear, probably because it fits really well.

p1020182

The nude elastics also came from The Emerald Studio, and the nude powernet came from The Bra Shop on Etsy.  I definitely feel like I’ve got more of a handle on all the different bits and pieces you need to make a bra, and have found a few different places to buy from.  There is a lot more available from US and Canadian suppliers, I have to say – but at least bra fabrics and elastics are light, and you don’t need much of them, which keeps postage costs down.

p1020184

I’m officially addicted to bra making now.  I’ve bought three more patterns to try – one from Make Bra, one from Merckwaerdigh, and one from Simplicity.  My next task is to find a pattern for pants, so that I might even have some matching sets……not something I currently own.  My one difficulty is that the bra patterns I’ve used so far specify low / no stretch fabrics, whilst nearly all the pants patterns are for stretchy fabrics.  Will have to keep hunting I guess….

Amber trousers

So far this year we haven’t seen much in the way of summer in Edinburgh, but I recently found myself with an urge to make some summer trousers.  I wanted something flowy and loose-fitting, and I considered a few different patterns, but pretty much everything I looked at had an elasticated waist, and it’s just not a good look on me.  Then somewhere, probably Instagram, I saw the Amber Trousers from Paprika Patterns.  They were perfect, with a lovely flat yoked front, and this project jumped straight to the top of my queue.

P1020073

I only seem to have one picture without my hands in my pockets……

I was a good girl and made a toile first, from some cheap polyester which is in the stash for just such purposes.  It was intended to be a wearable toile, but I got myself confused and ended up fusing interfacing to the outside of the pocket, rendering them decidedly unwearable.   I thought I had taken some pictures but if I did, I can’t find them……I seem to be getting more and more like my dad recently, including the absent-mindedness…..

Anyway, the fit was pretty good – I cut a size 7, based on my hip measurement – I just had to take the waist in a few inches.  My adjustment was just a wedge taken out of the side seams of the yoke, very unscientific (as usual), but did the trick.

P1020076

The yokes fit really well now, and achieve that flattering flat front look I was after.  I really like the pleats, too, there’s just the right amount of fullness.  They fit well at the back as well:

P1020085

They definitely skim the hips and bum, rather than clinging, which again is exactly what I was looking for in a summer trouser pattern.  There’s always the danger with a drapey fabric that all the lumps and bumps are highlighted…..

Speaking of the fabric, this was a particularly treasured piece from the stash.  I know, it’s blue again, what can I say?  I don’t wear black, or white, so I tend to use grey and blue as my neutrals of choice.  If you can describe blue as a neutral?   It was actually an incredibly lucky charity shop score – I think I paid about £6 for a length of just over two metres.  When I bought it, I thought it was some kind of peachskin / microfibre-type fabric, so I just bunged it in the washing machine straight away – I try to do this with all my fabric as I buy it so I know that things have been pre-washed.  When I ironed it, the texture felt decidedly silk-like, so I did a burn test and I’m 99% sure that it is, indeed, pure silk.  It feels fabulous against the skin.

P1020092

These closer-up pictures show the texture of the fabric, too.  It’s got a sand-washed silk feel to it, but with a pattern in the weave whereby some parts are less sand-washed and smoother – in particular you can see the rosette-type shapes which are much more reflective on camera.  They’re not actually the darker shade of blue they look like, it’s just that they are shinier.  The texture contrast is more subtle in person.

The trousers fasten with an invisible zip in the side seam.  I’m pretty pleased with how it went in….see it?

P1020096

How about now?

P1020095

It went in first try as well, which I was pleased about as I wasn’t sure how well the fabric would take any ripping out.  It’s fairly sturdy as silk goes though, I didn’t find that pins left any obvious marks, but I pinned in the seam allowance just to be on the safe side.  It was a bit shifty when cutting out, but I didn’t have to resort to the spray starch, just using my cutting mat and rotary cutter rather than shears was fine.

I’m really pleased with how these turned out.  They’re dead comfy, but they look like I’ve made a bit of an effort thanks to the luxe fabric.  My favourite comment from a friend at work was that ‘they look like you could have bought them from Harvey Nicks’.  High praise indeed!


A trio of Style Arc tops

My go-to outfit is jeans and a top, so I’m always on the lookout for interesting tops.  Lately I’ve discovered Style Arc’s pdf patterns on Etsy, and three designs caught my eye.  I couldn’t decide between the three, so I just bought them all, as you do.  Luckily this was just before the EU referendum (I refuse to use the term Brexit, on principle), so they were a good £1 each cheaper than they are just now.  I do have my eye on a few other patterns so I thought these relatively simple tops would be a good way into a new-to-me pattern company.  I’ve read that Style Arc’s instructions are along the Burda magazine lines – well, they definitely are.  At least these three are anyway.

My first top is the Ada knit top.  I was drawn to this for its pockets, to be honest.  I love a good pocket, even more so if it’s in an interesting place or unusually constructed.

P1020034

The pattern has a side panel, with the pocket being constructed when you sew the panel to the front and back.  There’s then a sort of square armhole, which gives the sleeves their grown on, almost kimono-ish look.

P1020041

You can just see the side panel here.  I made this up in some delicious bamboo jersey, from Edinburgh Fabrics.  I love this fabric – it’s incredibly soft with a buttery feel, good stretch and recovery, and it comes in any number of my favourite blues and greens.  Unfortunately though, last time I bought some the owner told me that he’s unable to get this in again as the factory that makes it has closed.  Sad news.  I resisted the temptation to go and buy up his entire remaining stock though, which I felt was very restrained of me!

The resulting top is dead comfy, easy to wear and is just that little bit more interesting than a plain knit top.  It also took about 2 hours from start to finish – including 20 minutes trying to work out how the square armhole worked.  I’ve already cut out another version of this – I made a size 12, and no fit adjustments – in a lilac linen knit I got ages ago from Les Coupons de Saint Pierre.  I think there’ll be others.

My second top is actually very similar, but in a woven fabric, it’s the Kaye tunic.

P1020061

It has the same side panel and square armhole with pockets, but with an interesting design detail of pointy side hems.  P1020067

It was interesting that the instructions for the construction of the square armholes was different to the Ada top – it has you do things in a slightly different order.  I ignored these instructions and just did the same as the Ada top – it was a lot easier for finishing the seams with my overlocker.

P1020063

I do love those pockets.  This amazing flamingo print viscose is just right for the muggy weather we’ve got at the moment – it’s very lightweight and floaty.  I bought it from Fabricland in Bournemouth a couple of years ago so it can’t have been expensive either.

P1020071

I like this tunic so much I’m contemplating lengthening the pattern and making it up so that I can wear it as a dress over leggings – or even in a winter weight fabric for wearing with cosy tights.

My final top is the Daphne tunic.  This was one of the new patterns for June, and I bought it in a bundle with the Daphne trousers – these look really interesting, being designed for a stretch woven waistband rather than elastic or a knit.  Anyway, the top is again a fairly simple design but with an interesting element in the tucks at front and back.

P1020047

I was a bit worried when I finished this one – laid out flat it looked like an enormous shapeless blob – but the tucks do their job and it does actually have quite a nice, cocoon-type shape.

P1020048

The fabric is a Japanese seersucker cotton lawn, from Miss Matatabi last year.  I’ve been hoarding this for a while, trying to find the perfect pattern.  It’s fairly narrow and I only had 1.5m so I knew it would need to be a top, but generally I go for quite drapey fabrics and most of my top patterns are better with those.  I thought this pattern might work quite well with a bit more structure though, and I’m pleased with how it turned out.

P1020051

I like the shape of the back with those two tucks and the grown on sleeves.  It’s a good length for me too, and again it’s nice and light and floaty.

P1020056

I made no attempt to pattern match – life is too short and due to the tucks the front and back are actually very different shapes flat, with shoulder and side seams being on very different angles relative to the grainline.

I’m really pleased with my little foray into Style Arc patterns.  Some interesting designs with quirky features, and three very wearable tops.  I realised when we took the photos of these that I’ve been on a bit of a blue kick!  I have another blue make photographed as well, I think I might have to have an amnesty on blue fabric for a while…..

Save

Helena dress

I love a good sack dress, and I’ve had my eye on the Helena dress from Sew Me Something for a little while.  It’s a paper pattern, so I waited until the Knitting & Stitching Show in Edinburgh to avoid having to pay postage.  I’m becoming one of those canny Scots I think….

The pattern itself is printed on quality, thick paper which I much prefer to tissue – I trace everything anyway, and tracing off tissue is not fun.  It also comes in a nice card envelope which comes in handy for storing the traced pieces too.  I traced off a size 14 at the bust, grading to a 16 at the waist and hips.  I deliberated over size for ages, I’ve had a run of things being a bit big, and eventually went for the recommended size based on my measurement – using my high bust measurement, rather than full bust.  And, well, this happened….

Excuse the curious cat poking his nose in.  I got to this stage with just the hem to do, tried it on, and it became obvious that a) I definitely didn’t need to go with my full bust measurement and b) I really didn’t need to grade up a size at the waist and hip.  In fact I could probably have done with at least one size down, possibly two.  After a small meltdown, I had a bit of a brainwave.  I remembered seeing this post on Jenny’s blog (I’m not actually stalking her, promise) and I thought gathering the skirt into a wide band at the hem might just rescue the situation.

I employed a highly scientific process – as usual – to draft the band.  To save cutting anything from my main fabric straight away I rootled through my boxes of scraps until I found a piece that looked about the right length and width, and pinned it on, just gathering up the hem as I went along.  It seemed to work, although the band was just a smidgen tight over the hips – the dress just pulls on, no zips or buttons.  So I then cut a band from my main fabric, eyeballing the width I wanted then doubling it over, and adding 5 cm in total to the length for extra hip room.  Then I just gathered up the skirt, folded the band in half lengthwise and joined the short ends together, then attached the two raw long edges to the hem – similar to a t-shirt hem band or neck band.  I’m actually really pleased with the result.

P1020027

It is still overly roomy around the shoulders and armpits – the bust darts are really low – but it’s now something a bit quirky, with a more interesting shape than just a standard too-big sack dress.  It’s also nice and cool – despite us not really getting much sunshine so far this summer, it’s been warm-ish, and our office is just like a greenhouse so floaty is definitely good for work.

P1020015

Pockets!

P1020025

The fabric I used is a light-to-mid weight linen from Fabricland.  We were down south in June and I always have to make a trip to Fabricland when we’re there.  Although they now have a proper website, and online ordering, which might be dangerous!  Anway, for once I went with a list this time round, and one thing on my list was fabric for this dress.  I fell in love with the colour, I’m a sucker for anything teal, and the price at £6.99 a meter was pretty attractive too…..this is a really nice linen as well.  These pictures were taken after I’d worn this to work for the day – so it had been through bus journeys, washing up, cat litter cleaning and all sorts, and it’s got that nice rumpled look to it.

P1020022

I like the length of this dress, it makes me feel taller with its longer lines – I did feel a bit dumpy in the un-banded version.  I actually feel really good in it – it’s a bit unusual, it’s my colour and it’s incredibly comfortable.


I know it’s probably not to everyone’s taste but I’m really pleased with it.  The sleeves roll up with a buttoned placket, and I used some pretty ceramic buttons I’ve had for ages which work perfectly.  It’s a nice dress to put together, with a really clean finish to the yoke – I think it’s the same as what I’ve seen referred to as the ‘burrito’ method, and you end up with all the raw edges enclosed inside the yoke.  The other raw edges are all finished with my overlocker, like most linen this was a bit fray-y.

P1020029

P1020024

I’ll be able to wear this version in winter as well, with tights and the sleeves rolled back down.  I also think I’ll make this again in a smaller size without the band as it was intended.  I think it would be nice in a wool crepe or a nice brushed twill or flannel for colder weather.  So in the end, a nice success salvaged from an almost disaster.  One of these days I’ll make something that doesn’t end up too big…..although sods law says the first time I do size down based on measurements it’ll be tiny…..


Morgan Jeans (and a sneaky top)

I’ve been procrastinating for months about fitting the Hot Patterns boyfriend jeans – I did make another pair in a moleskin, non-stretch heavyweight cotton which were an improvement over the last ones, but still not right by any means.  So when I saw Heather of Closet Case Files’s new pattern was a boyfriend jeans pattern, the Morgan Jeans, I had to snap it up.  My Ginger jeans all fit really well with very few adjustments required, so I thought the Morgan jeans would be at least a much better starting point than the Hot Patterns ones.

I did go for a wearable toile, using some stripy denim I got at the Knitting & Stitching Show in Edinburgh at the end of April.  Unfortunately, the stripes produce an optical illusion similar to a target when photographed which is….awkward…..I’ll leave it to your imagination!  This is the best photo I have of the jeans from any distance, please excuse the silly face….

P1010981

Please also excuse the fact that I’d been wearing these for two days before taking these photos.  I went for the cropped length with these – by which I mean hacking off a good 10cm from the hem, the cropped length on the pattern actually ends up being the perfect normal length for me.  I cut a straight size 16, and apart from the length, the only adjustment I made was to take my normal wedge out of the top of the centre back seam.  I’m pretty happy with the fit, particularly when they’re not all bagged out with wear…..

P1010983

You’ll see that I cleverly avoided having to do any sort of stripe matching by cutting the back pockets so that the stripes went the other way – I did this for the waistband, coin pocket and hip pocket facings as well.  Yes I am lazy, but I quite like the effect as well.

P1010985

I actually really like these, and they’ve been handy for the few hot days we’ve had so far this summer – hot being a relative term, obviously, the denim is lightweight but would probably be too warm for proper hot weather, anywhere but Scotland…..  They’re a little bit on the large side, I could probably have gone down a size but heeded the pattern instructions to go up if you’re between sizes.

Feeling pretty confident on fit, I went ahead and cut into my lovely dark indigo selvedge denim.  I swithered for a while about going down the size, but it’s a much heavier weight fabric than the stripes, and again decided to err on the side of caution.

P1010998

Again, these photos were taken on holiday after several days wear, so excuse the wearing creases.  After basting these to check the fit, I came to the conclusion that I should probably have gone down a size.  I ended up sewing a 2cm seam allowance on all the vertical seams (apart from the fly) just to bring them a little closer in, as well as the normal centre back wedge, and in general I think that did the trick.  These are super comfy, and just right for the casual look I was going for.

P1010997

Not sure why I’m leaning so far forward here!  The denim is much darker than it appears in these pictures, it’s a true dark indigo which I love.  I think it will wear and fade really nicely as well.

P1010996

The fit of these is great from the front, and in general I’m really happy with them, but there is some wrinkling under my bum which is really obvious here, and to a certain extent in the stripy pair as well.  Does anyone have any tips as to what’s causing this?  I’ve done a bit of research and wonder if I need a full seat (hate that word) adjustment?

P1010999

One of the things I love about this pattern is that button fly.  You can just see the bottom of it peeking out from under my top.  As usual, Heather’s instructions make putting the fly together dead straightforward, and it just adds that certain something to an already great pair of jeans.  There is a lot of hammering involved, obviously, and I would recommend not doing this part of construction early on a Sunday morning because you can’t wait to finish your new jeans and wear them straight away.  This may cause marital discord (ask me how I know….)

P1020009

Love that row of buttons, something very aesthetically pleasing about it….

I used some scraps of Nani Iro fabric (left from my Flutter dress) for the pockets and waistband lining which makes me smile every time I put my hands in my pockets.  My machine had a little bit of a tantrum over topstitching the waistband, I had to rip it out once and even after fiddling about with the tension and scrap practice for ages it still isn’t quite right on the inside.  Looks fine on the outside though, so I wasn’t going to rip it out again!  The colour in the above picture is probably the closest to real life, just imagine it a couple of shades darker still…..

P1020010

I went for a classic copper colour for topstitching, and I’m really pleased with how it turned out, again I took that little bit of extra time to make sure it looked good rather than rushing it.  I’m calling these a big success, they’re comfy, fit relatively well and fit into my casual wardrobe perfectly.  There will be definitely be more Morgan jeans in my future.


P1010988

As a quick Brucey bonus, the top I’m wearing is also a relatively new make.  It’s the same combination of fabrics as I used for my Aurora top, and the pattern is the Jersey Top from Simple Sew, received free with Love Sewing magazine a while back.  I do love that slouchy feel, those raglan sleeves and the lovely wide neckline.

If anyone does have any fitting suggestions for my under-bum wrinkles they’d be very gratefully received!

Burdastyle velvet dress

I’m usually very much a fabric first, pattern later kind of girl.  Sometimes I’ll have a rough idea of what type of garment a fabric will be destined for, but it’s rare that I see a pattern first, then look for fabric to make it in.  This dress was one of those rare occasions.

P1010970

This is #109A, Scoop Sleeved Dress, from the September 2013 issue of Burdastyle magazine.  The sample shown is made up in a patterned silk velvet, and I fell in love.  The relaxed fit, the little cap sleeves, the interesting sleeve structure, and of course the fabric are all right up my street.  This dress is the reason I went hunting online for silk velvet last year, eventually finding some at Les Coupons de Saint Pierre for an incredibly reasonable €45 for 3 metres.  It’s the fabric I used for the Incredible Levitating Top, which was meant as a trial run for working with this slightly tricksy fabric.

P1010971

In the end the fabric wasn’t too difficult to work with.  It is quite fray-y, so I overlocked the edges of all the pieces after cutting them out – I um-ed and ah-ed for a while about doing this, it felt a bit like sacrilege to take a clumsy overlocker to such a beautiful fabric, but I think it was the right decision in the end.  It definitely made the various bits of handstitching much easier – I practised on a spare bit before doing the overlocking and the fraying made things quite difficult.  Cutting out was less troublesome than I had anticipated, I used my rotary cutter rather than shears, and cut each piece flat rather than on the fold.  When it came to construction, I realised I hadn’t necessarily been as accurate as I might have been, there was a little bit of excess fabric at the end of the sleeves, but I was able just to chop the excess off with no issues.  That wasn’t all down to the fabric though, precision is not my strong point with any fabric…..

P1010969

The simple shaping of this dress also helped with the tricky fabric – there are two darts at the back and that’s it, no zips or buttons either.  I cut a size 44, the largest size available, but really needed more like a 46-48 at the hips.  With no bigger size to grade to, I simply added 2cm to the side seams at hip level  and drew a gentle curve from the waist out to my new hip line, and back in again at the hem to preserve that lovely shape.  This highly scientific adjustment worked a treat and I’m really pleased with the fit.  It’s meant to have quite a bit of positive ease – after all there is no zip, it just pulls on over the head – and in this fabric it just skims over the body with a lovely drape.

P1010968

P1010972

The neckline, whilst relatively high, is wide enough for me not to feel strangled and I love the way it looks.

P1010974

P1010975

P1010976

The neckline and hem are both handsewn, along with the inside of the sleeve.  You can see how deep the armhole is – the sleeve is very cleverly constructed though so there are no bra issues, as you can see in this super-elegant shot of my armpit….

P1010978

So clever.  Luckily this pattern was one of those for which Burda helpfully provide a ‘sewing course’ – ie some slightly more detailed instructions.  This made working out the sleeve construction much easier than I’d feared.  In general the rest of this was very simple to put together, and even with the bits of hand sewing only took me a few evenings to complete.

I absolutely adore this dress, although I’m not quite sure when I’ll wear it.  Every office Christmas party for the next 10 years?

A bright blue coat

A while ago I bought a pdf pattern for a coat, the Sophia coat, from a Japanese pattern company, Tamanegi Kobo.  I hadn’t heard of them before but saw a beautiful version of the Sophia coat on one of the blogs I follow – Rennous-oh-glennous.  Obviously, having snapped up the pattern the very same day, I then waited a year before even thinking about finding a suitable fabric.  Procastination, me?

P1010932I got there in the end……

I went to the Knitting & Stitching Show in Harrogate in November, had a girls weekend away with my mum and sisters.  Fabric for this coat was top of my list to look for, and I found the perfect thing.  This beautiful blue cloth has a selvedge which claims a fibre content of wool, cashmere and mink.  I definitely believe the wool and the cashmere – this loved a good steam, and it’s super soft and warm whilst being lighter than you’d think – but I’m not entirely convinced about the mink.  Not that I would recognise mink if I saw it, it just conjures up images of old Hollywood stars in furs, rather than any sort of fabric.

It’s got an almost felted, brushed texture which is incredibly soft to the touch, and at a bargainous £1o a metre and 150cm wide it was extremely affordable.  I’m not sure whether it will wear all that well, but it seems to be holding up so far – and I’ve worn this nearly every day since I finished it a couple of weeks ago.  And of course there’s that gorgeous colour – I totally fell in love with it.

P1010935
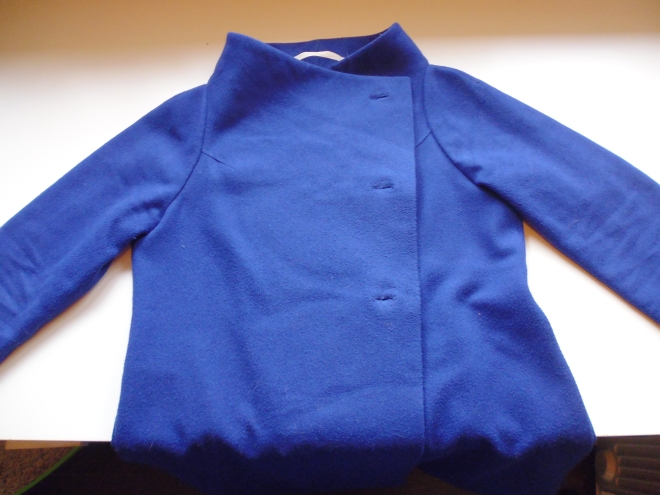
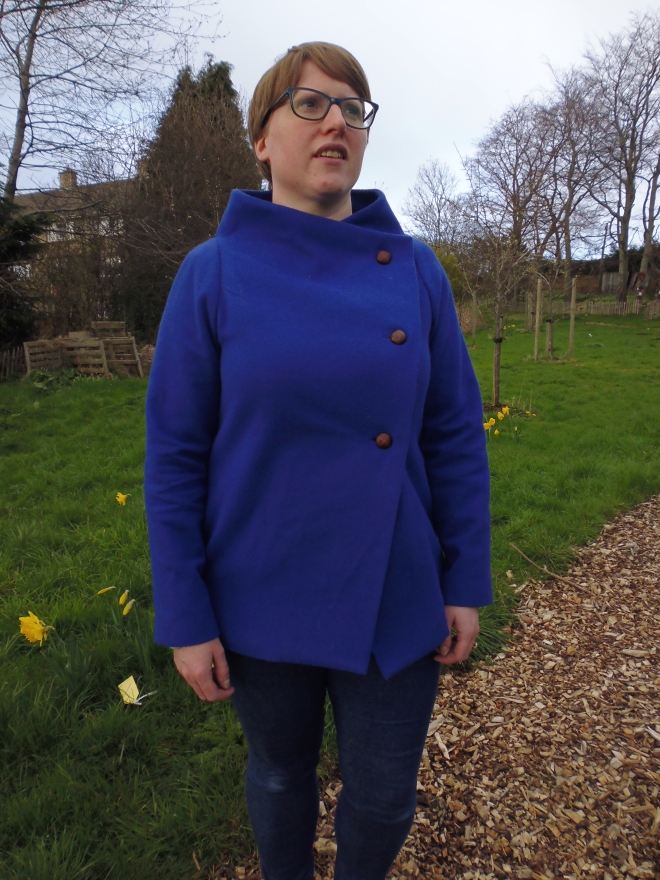
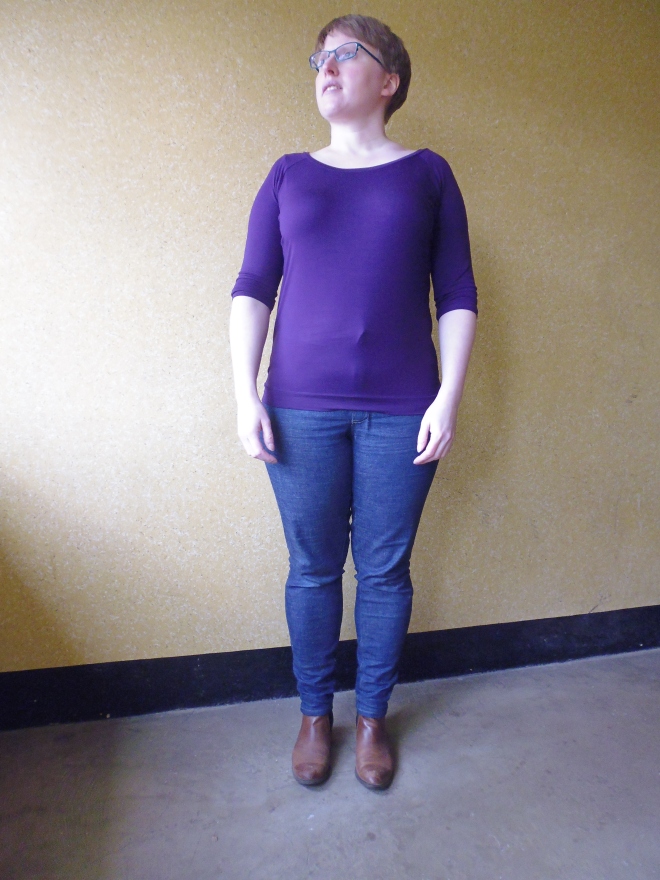
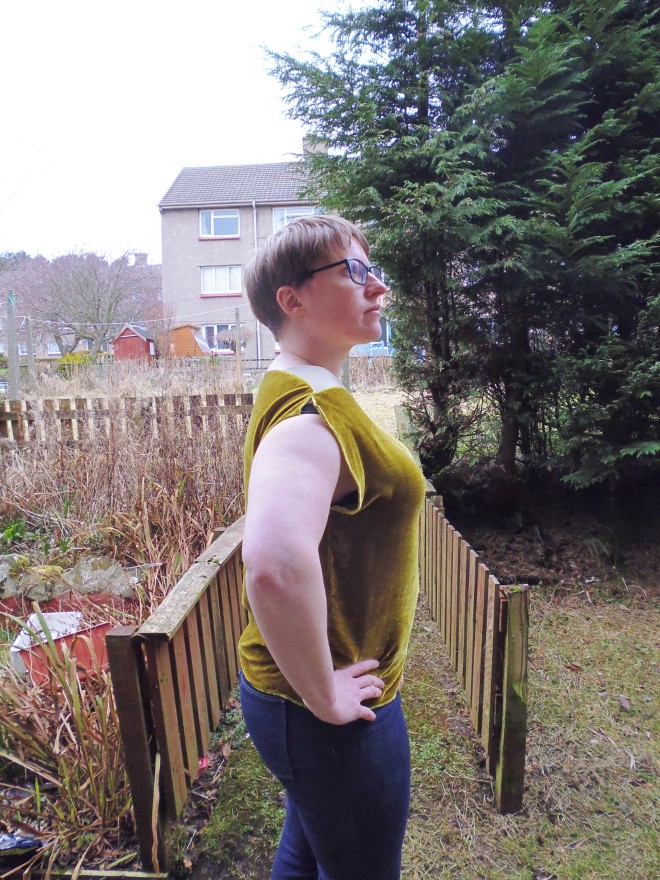
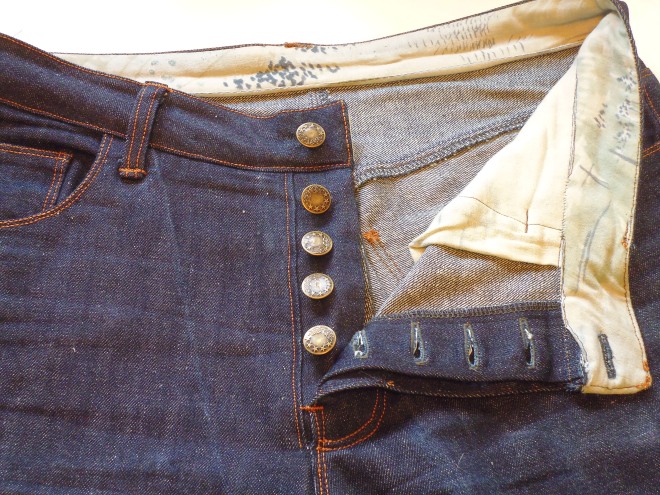
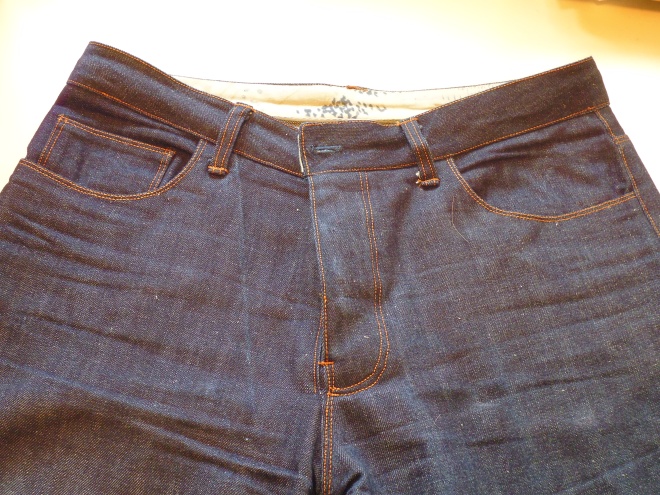
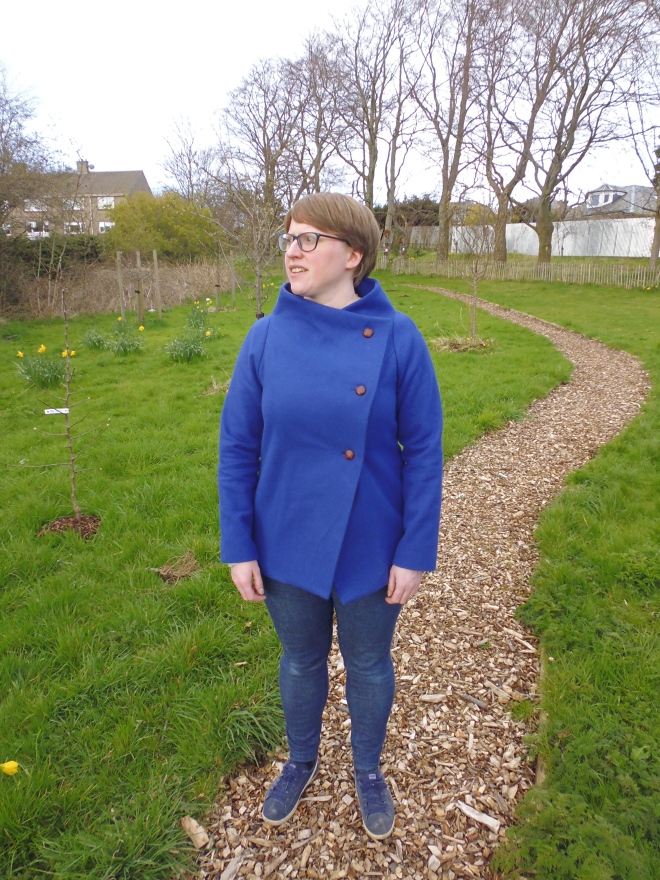
Size-wise, this is a Japanese pattern, and therefore definitely seems to be designed for small people.  The body and sleeve lengths are spot on for me, so taller people might need some extra length.  When I purchased the pattern 18months ago, my measurements fit perfectly with the largest size (42) – unfortunately I have put on a bit of weight since then so it’s a smidgen snug on me now.  Not uncomfortably so, but you can see a little bit of pulling at the bottom button.  Given the double breasted style I could probably move the buttons slightly to fix this but we’ll see.  Otherwise fit feels good, I love the unusual shoulder design which works well on my smaller frame.

P1010937 
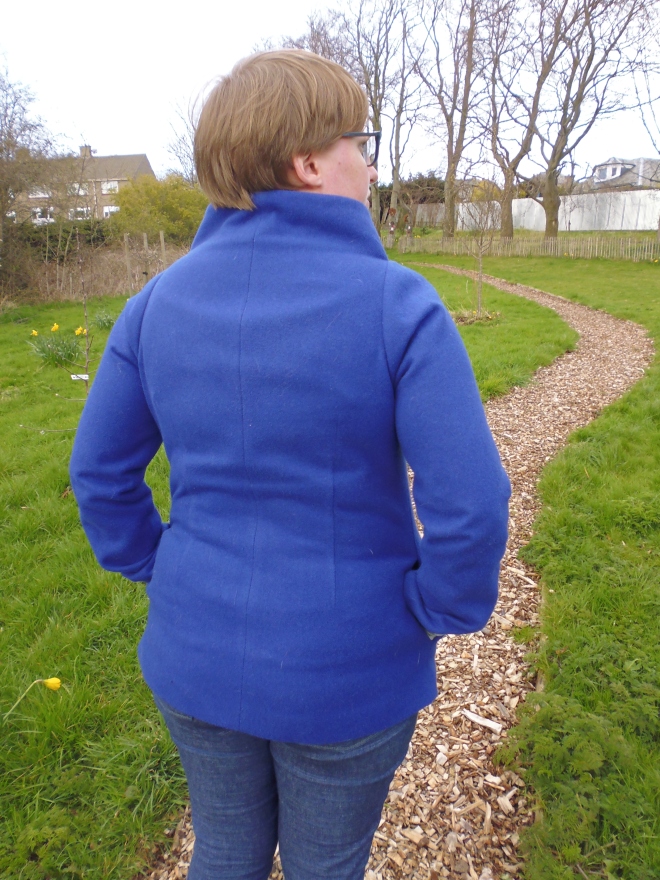
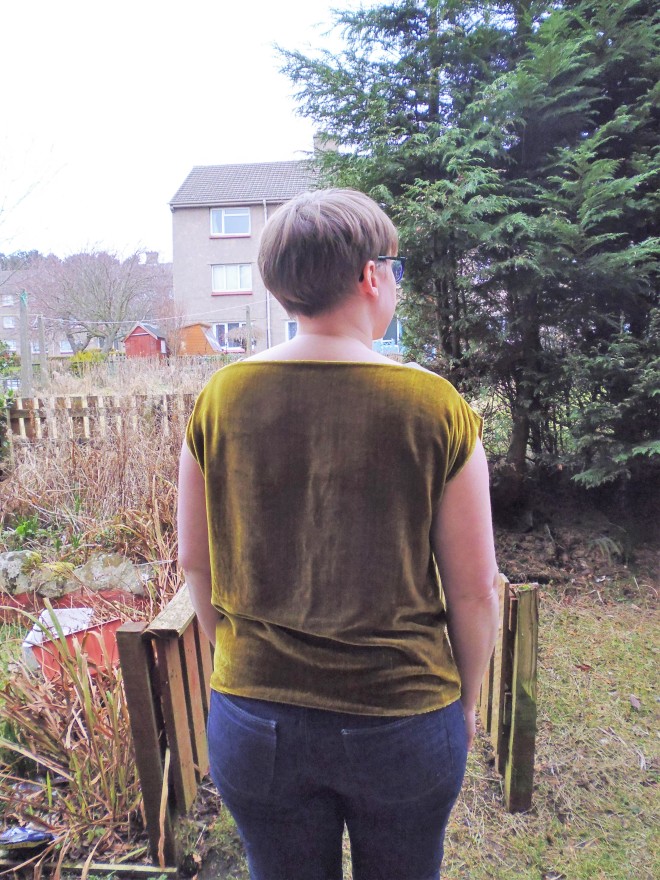
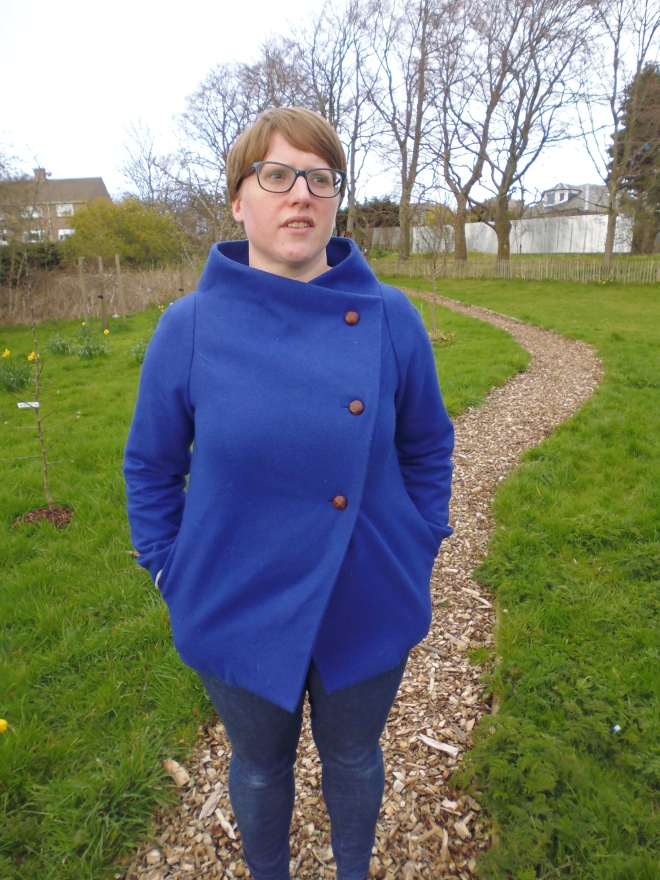
That collar not only looks good, it’s excellent for keeping out the cold Edinburgh wind.  I was a little worried that I’d finished a warm coat just in time for warmer weather…..but we haven’t had any of that!  It even snowed a bit yesterday.

P1010930
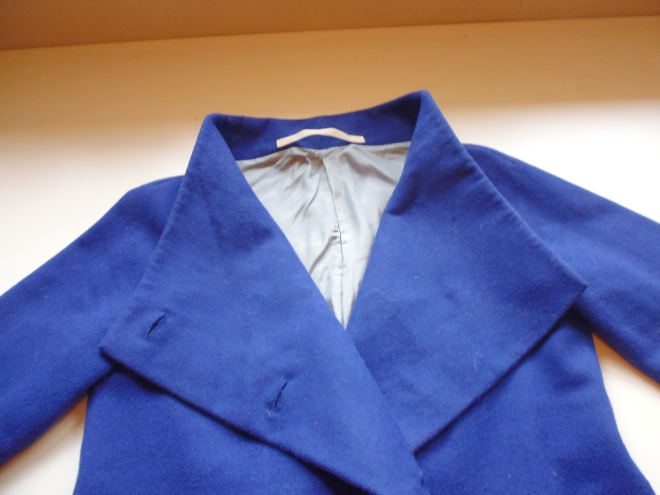
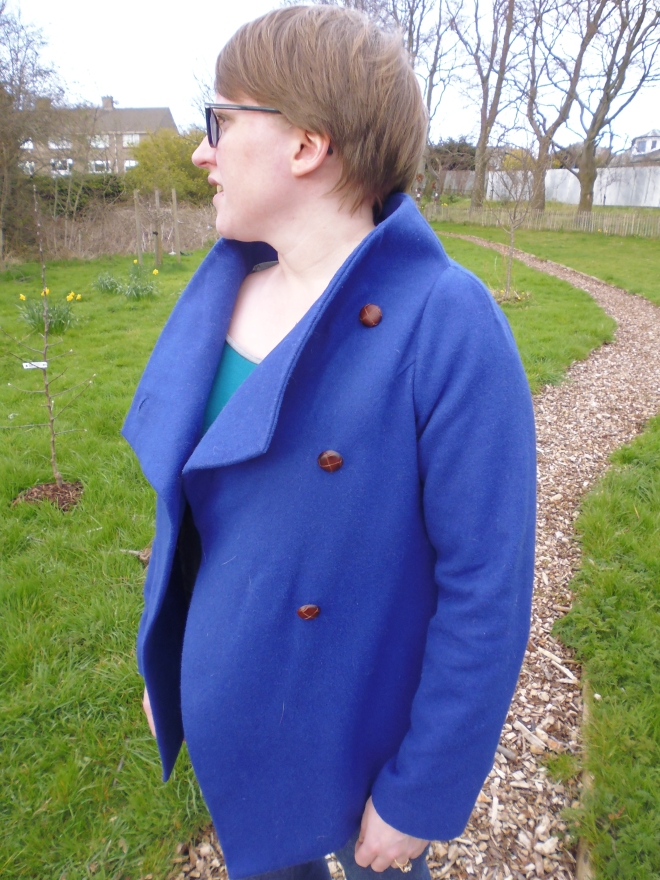
The buttons came from Hobbycraft, surprisingly, and are exactly what I had in mind.  You can see the texture in this photo as well (along with a number of cat hairs, sorry…..).  They’re not real leather, but they’re just the right size and colour I think.

P1010926
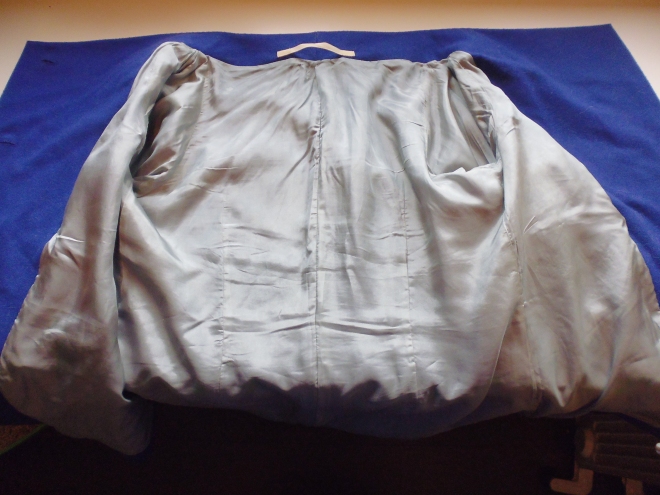
The lining was in my stash, I have no idea where it came from originally, but it’s a high quality, anti-static lining which feels really luxurious.  The pale blue/grey works well, too.  I like something a bit sturdier for pockets, so they are made from some scraps of peacock-feather cotton lawn originally used to make pyjamas for Mark.

This was a great pattern to work from, although maybe not ideal for beginners.  There are a lot of markings on the pattern, but only the instructions are translated into English – so you need to have at least a rough idea of what the markings are for.  The English instructions are also fairly minimal – I had to resort to Google for the final step of inserting the sleeve linings, which is done on the sewing machine.  Luckily the Sewaholic Minoru jacket sewalong came to the rescue.  To give you an idea, go and read through that link, then compare to the instructions provided – ‘With right sides together, match shell and lining cuffs and sew’.  Well, yes, but……!  Apart from that, though, the diagrams were helpful and the many markings really provided a lot of instruction in themselves.

P1010943

I love the way the collar comes straight out of the shoulder seam, and that little shoulder dart is fab too

The pattern calls for two inside buttons but you can see here that I didn’t bother.  When I tried the coat on after doing the main buttonholes and buttons, the front sat perfectly without anything else being needed.  I did contemplate snaps, which would have avoided doing more buttonholes, but decided they weren’t required in the end.  I might go back and include either buttons or snaps at a later date if I think they’re needed.

P1010942Importantly, the pockets are definitely big enough to keep your hands in, and will take my large phone or my bunch of keys quite happily.  The pockets are joined to the facing before the lining is installed – I used short lengths of grosgrain ribbon rather than the intended pieces of lining fabric.

P1010944
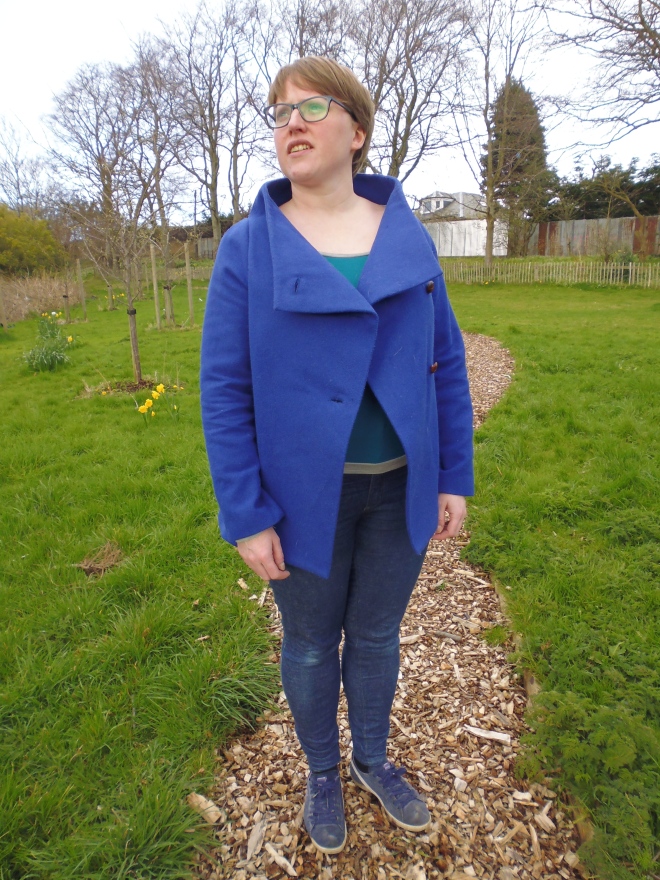
I like the way this looks open as well, although it’s a bit cold at the moment for this to be comfortable……once it gets a bit warmer though I think I’ll be wearing it like this a lot.  The pattern includes a self-fabric belt, with thread loops, but I never get on all that well with fabric belts.

P1010948
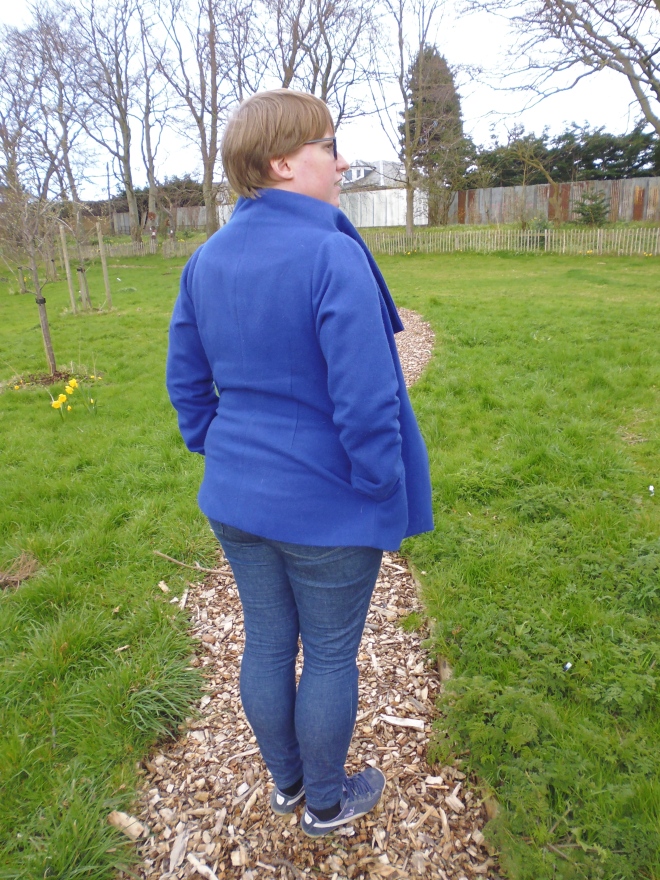
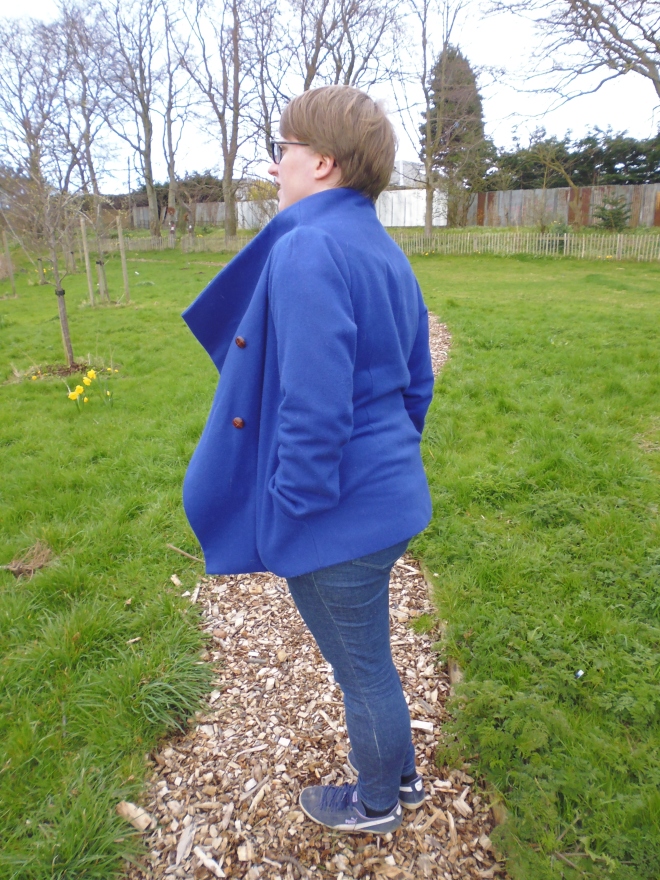
I do love this coat, and it’s received a lot of compliments.  Living in Scotland means that in all likelihood I’ll be able to wear it all year round!  I’ll leave with some more photos, this is one of my favourite makes of the last few years so I have a lot of them…….

P1010934P1010927P1010947P1010928P1010940P1010938


Just jeans and a top

I spend a lot of time wearing jeans and a top, and having handmade options is one of the reasons I love sewing.  These jeans are another pair of Gingers – this really is a favourite pattern for me now.

P1010827

This is view B again – high rise, skinny leg – in the same slubby denim from Les Coupons de Saint Pierre that I used for my Hot Patterns Boyfriend Jeans.  It’s much happier as a pair of skinny jeans, being quite lightweight.  I cut a straight size 10, and shortened the legs by 5cm (I think) before cutting out.  As usual I basted them together to check everything was fitting ok, and had to make one more minor adjustment.  This fabric has slightly less stretch than my silvery-grey pair, so I needed a bit more room in the calf area.  I just graded out to a 1cm seam allowance at the fullest part of my calves, and brought it back to 1.5cm just above the ankle, all the way to 2.5cm at the bottom of the leg.

P1010843

I think I could probably still stand to bring the ankles in a bit – I have ridiculously tiny ankles compared to my calves.

P1010840

You can see the pooling around the ankle where there’s a bit too much room.  The only problem with making the ankle skinnier is that they’re just about ok to get over my feet, even at this width.  Much narrower and I’d be struggling!

As always, I really like the rear view of these jeans – they fit my bum perfectly and definitely hug in all the right places.  The creases around the knee are just wearing wrinkles – I’d had these on all day when I took these pictures.

P1010846

Having been a bit dubious, I’m now a total convert to this high rise malarkey.  The pocket stays hold everything in place, and I can wear any length of top without worrying about flashing any parts that shouldn’t be flashed……

P1010850

In stretch denim, without interfacing, the waistband is really comfy too, despite the height of the rise.  This pair and my silvery-grey pair are on high rotation in my wardrobe – they both have pretty good recovery so can be worn at least 3 or 4 times before needing to be washed, and I make the most of that.  They’ve completely supplanted my straight leg, lower rise pair of Gingers, but I think my next pair of jeans will be another attempt at the Boyfriend Jeans – I’m getting closer with the fit on those having made another toile in a non-stretch fabric.

P1010859

And so to the top.  This is a very simple, raglan sleeve T-shirt, made from a pattern taken from a RTW top that I loved until it fell to pieces.  The fabric is a high quality viscose jersey that has a bit of body to it – I think it came from John Lewis.  Anyway, I love the colour and it works perfectly for this top, I didn’t want anything too thin and drapey.

P1010871

The sleeve length was one of my favourite things about the original RTW top, I do like an elbow length sleeve.  The sleeves, neckline and bottom of the top are all finished with bands – again in imitation of the original, but also probably my favourite way to finish a simple T-shirt like this.

P1010874

I really like the neckline, both front and back – predictable really, it sits wide on my shoulders and is low enough that I don’t feel constricted.  I’ll definitely be making more of these.

Sometimes it’s all about the fabric

I don’t lead a very glamorous life, but I think I’m going to have to find some sort of glamorous event to go to, just to wear my new top.

P1010790

This is made from a sumptuous silk velvet from Les Coupons de Saint Pierre.  I’d been looking for some silk velvet for ages – not really with any concrete project in mind, just for stroking – but it’s quite difficult to find.  I’m not sure where I came across this website, but I thought 3 metres of 150cm wide fabric for €45 – about £35 at the time – was very reasonable.  There was a good range of colours as well, it took me a while to narrow it down to this chartreuse / olivey green.  When it arrived the price seemed even more reasonable – this stuff is seriously gorgeous.

P1010796

I originally took these photos to show you my new Ginger jeans, but when I look at them the top just takes all the attention, so we’ll do the jeans another time.

Obviously with a special fabric like this, it took me ages to identify the perfect pattern.  I still haven’t really, this only used just over half a metre, so I have plenty left for a proper project.  I was flicking through an old notebook and came across this picture I must have ripped out of a magazine years ago.

wp-1457298431952.jpg

I quite fancied a similar top, and then remembered one of Burda magazine’s ‘non-patterns’ from the July 2012 issue.  This issue included a number of patterns designed to use silk scarves as the base fabric, including this little number (sorry for the crappy phone photo…)

wp-1457299547847.jpg

It’s literally two silk scarves, with two leather pieces for the shoulders and two straight seams for the sides.  I suppose at least Burda charges a fiver for this stuff, Nicole Farhi seems to have done pretty much the same thing and flogged it at £250 a pop!  Anyway, I thought it was a good approximation of the inspiration piece, and promised to be pretty straightforward – I wasn’t sure how easy this velvet would be to sew with.

The ‘pattern’ calls for two silk scarves at 51cm square – it seems a pretty pricey way to buy fabric, unless you got incredibly lucky and found two identical scarves in your local charity shop – and it only covers Burda sizes 34, 36 and 38 whereas my usual size would be a 40 or 42.  I took a scientific approach guessed that a 55cm square would probably be about right, so I cut two squares from my precious length of fabric, and hemmed each edge.  I was pleasantly surprised at how un-tricky this proved, there was pretty much no fraying, and I used my walking foot which prevented any weird shifting of the fabric, making it a simple process.

The shoulder pieces were cut from some soft leather scraps I picked up for £5 at Edinburgh Fabrics – Burda provide a pattern piece for these, a diamond which you fold in half and glue to make triangles.  These are then sewed to the top of the two squares, slightly in from the edge – this is what it looks like from the inside (left) and the outside (right):

Then it was just a process of carefully measuring guessing how much of a gap I needed to leave for the armholes, and sewing a 1cm seam allowance down the two sides.

P1010912

Possibly the easiest top ever, but very effective.

P1010797

P1010799

The leather is pretty much exactly the same colour as my skin, which has the unintended but cool effect of making this look like it’s mysteriously floating along my collar bone.

P1010789

So, any suggestions as to a suitable glamorous event I could attend?  Maybe I’ll just have to wear it to work in the absence of a better offer….